Saturday, 12 November 2011
Facebook Fan Page
Whether or not I'll be able to keep up with it I don't know. If it starts to interfere with the kiddiwinks then I shall put a stop to it and once I'm back at work next year I'm guessing I won't have much time at all! We shall just have to see. I really hope I can keep it up and running as I just love to get my things out there! I have so many ideas for new bits and pieces too :)
If you'd like to find me I'm 'Sew Crafty Lisa Jayne' (I'll add a link box thingy-ma-jig on here once I work out how to do it!)
Tuesday, 4 October 2011
Sophie Collage and Bunting


Before Sophie was born I wanted to create some personalised artwork and matching bunting for above her cot. I found some gorgeous scrapbooking papers in a local craft shop so decided to use them for both the framed picture and bunting, so as to tie it all in together.
I didn't manage to finish the picture in time as Sophie arrived early but I've been able to finish it off recently and really pleased with the result. I used a mixture of the papers I found along with different fabrics and ribbons. I personalised it by embroidering her name and date of birth onto a piece of linen fabric.
I love the framed picture and feel it's a great keepsake which will last for years to come.
Apple Upside-Down Cake
I forgot to add the ground almonds into the mixture though so instead sprinkled flaked almonds on top whilst it baked and added more once out of the oven. Then finished it off with a sprinkling of icing sugar.
I turned mine around because the almonds looked better on top I thought. So this one I made isn't technically upside-down! Whichever way you choose it'll still taste as good!....try it warm with custard, yummy!!
200g caster sugar
4 eggs
225g self-raising flour
25g ground almonds
3 eating apples, thinly sliced
3 tbsp golden syrup
1. Heat the oven to 180c/gas mark 4
2. Line a deep 20cm spring-form cake tin with paper and grease it. (I used a sandwich cake tin and it came out fine)
3. Whisk the butter and sugar together until light and fluffy
4. Mix in the eggs then fold in the flour and almonds. If needed, add a little water to make the mixture easier to spoon into the tin.
5. Line the base of the tin with layers of apple slices.
6. Add the golden syrup then spoon the cake mixture on top.
7. Bake for one hour. Cool the cake in the tin, turn out onto a wire rack and remove the paper.
I found because I used a sandwich tin there was a bit too much cake mixture. I made a few cupcakes with the excess. I sprinkled cinnamon, flaked almonds and granulated sugar on top before putting in the oven. Once cooled I made a few holes in each with a fork and dribbled some golden syrup over the top :)

Monday, 3 October 2011
Fun Birthday cake for Daddy!
I created the swirly ones by using ready to roll icing. I coloured half of it and rolled the plain and coloured together and sliced. I think they look quite fun!
Don't think i'll be putting green buttercream inside a cake again though. It may have tasted good but it did look a little strange!!


Cake, cake, cake!
I've now used the recipe to make a couple of cakes and cupcakes too :) I'm really getting into this baking malarkey whilst on maternity leave. Often with Joshua lending a helping hand....and helping me to create more mess in the kitchen!!
I've banned myself from baking for the last week or so though as it's doing nothing to help me loose this last bit of baby tummy ;) That's the only problem with baking. I love to bake but also love to eat my creations too!!
Anyway, here's the link....Check it out, it's a must!
http://www.howtomakecakes.co.uk/2007/09/back-to-victoria-sponge.html


Wednesday, 6 July 2011
Surprise arrival!!!
I had just finished work on the Thursday to start maternity leave and Sophie decided to arrive after the weekend on the Monday!! The very day I'd planned to pack my hospital bag once and for all and also write my birth plan! I'd quite fancied a water birth but with her arriving early I couldn't. I wasn't too bothered though, as long as she arrived safely I didn't care.
Call me strange/ weird and/or slightly mental but I loved being in labour!! I managed with just co-codamol and gas and air too! I just tried to stay calm, concentrating on my breathing and put myself in a bubble and lost all my inhibitions! The whole birth lasted for just over 12 hours with the first contractions starting at 3.20am in the morning.
She's perfect...we are all so made up, including her big brother Joshua!
Wednesday, 15 June 2011
Decorated Jars
I've made them all for different uses using lots of bright, funky papers, ribbons, buttons etc to decorate them.


Sock Rabbit


My Birthday Cakes!
Friday, 29 April 2011
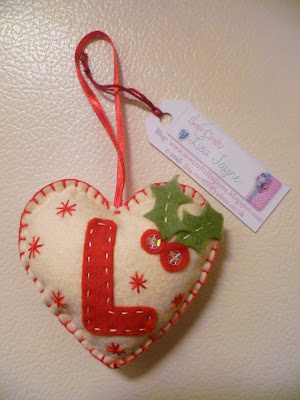
Christmas Decorations


Thursday, 28 April 2011
3D/4D scan photo
We were there for an hour and a half. We got to see her smiling, yawning, wriggling around and sat cross legged with her legs right up underneath her chin (!!)
The sonographer also confirmed to us that it is a little girl...I was still convinced it was a boy up until now!
Joshua seemed interested in the whole thing too...at least for half the time we were there. He was happy playing with a farm set later on!
I think the experience has helped him to understand more what's actually going on in my tummy too. He's started saying 'Baby Sister' now and still loves to kiss and cuddle bump :) He's going to be a fantastic big brother.
Here's one of the photos of her at just under 27 weeks...she looks like she has beautifully defined lips :)...

I feel like i'm being kicked left, right and centre at the moment! She has really strong kicks now, they take me by surprise sometimes, make me jump! Some of them actually hurt! Joshua was never this wriggly!!
Union Jack Sock Mouse!


Mum's 50th Birthday cake
I got a few tips from my friend who is into making cakes - Thanks Sarah!


I really enjoyed making it and luckily it tasted good too after all the effort I put into it.
I'd love to get into cake decorating...Seems like a very expensive hobby though!
Fingerprint Picture...


Thursday, 17 March 2011
My new addiction.......!
I LOVE it...totally addicted. It's a great app where you can transform your own photos with a whole range of different filters. You then upload and they are then availiable for people to see. There's a whole Instragram community where you can follow other uses and they can follow you. You're able to see tons of amazing photography.
You don't need to be a photographer to use it but I think it helps to have some idea of photography to do it well! Saying that you can turn a photo of a grey miserable day to something amazing just by trying out the many different filters....Try it and have a go! I'm 'lisamet' if you fancy finding me and seeing my photos.
Here's a few of mine....


Wednesday, 16 March 2011
It's a GIRL!!!
This is the scan pic and the first baby-gro we bought her yesterday...
Flower Girls cards
She asked for a keepsake attachement to be the main focus on the card.
I decided to make two decorative hanging hearts with ribbon gerbera flowers on them. (Fushia pink gerberas will be in the bouquets)...


Saturday, 29 January 2011
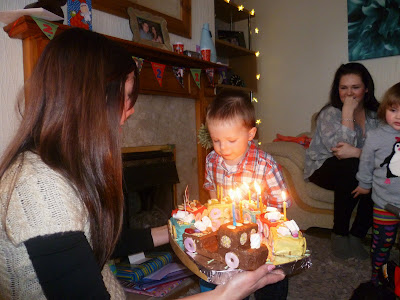
Joshua turns 2!
It was a bit of a squash and a squeeze to fit everyone in but had a fab time! Joshua got lots of great presents and loved all the attention he got during the day :)


